See our Customer Workflows for video walk-throughs on common tasks.
Once you have completed all of your product check-in for each of your distributors, and are ready to begin selling comics for the week, you have the Customer Orders screen.
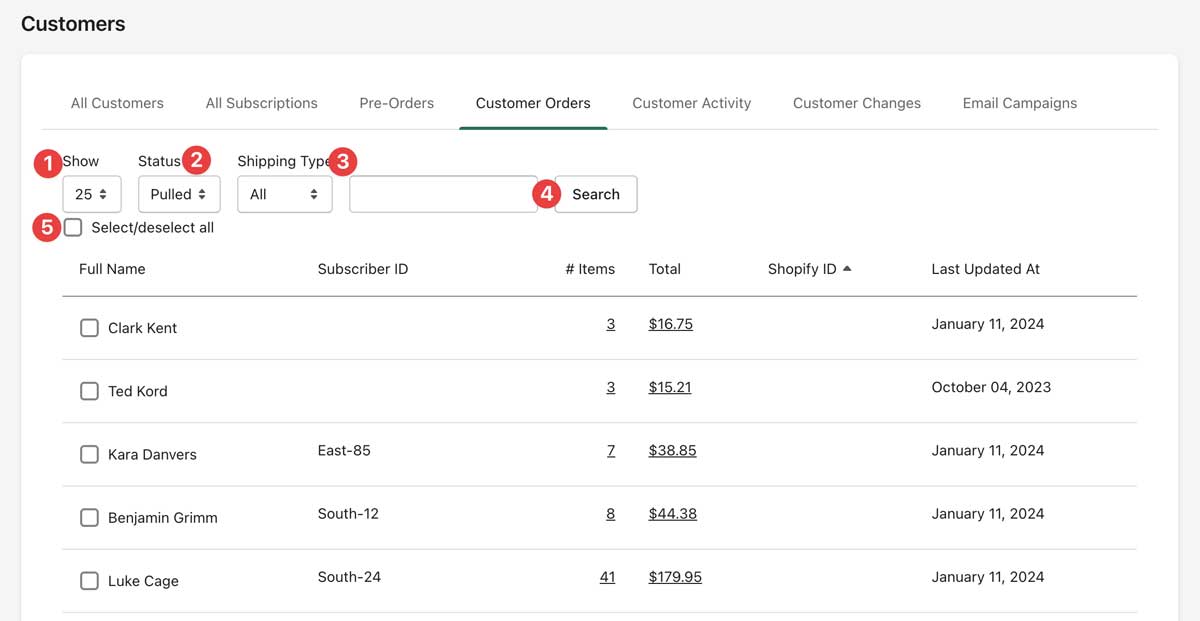
From the Customer Orders screen, you will find a Show (1) dropdown which allows you to change the number of orders showing per screen, Status (2) which shows various statuses of Manage Comics orders, Shipping Type (3), and Search (4).
You can sort the orders by name, Subscriber ID, or last updated, and you can search for a specific user (4).
Order Statuses:
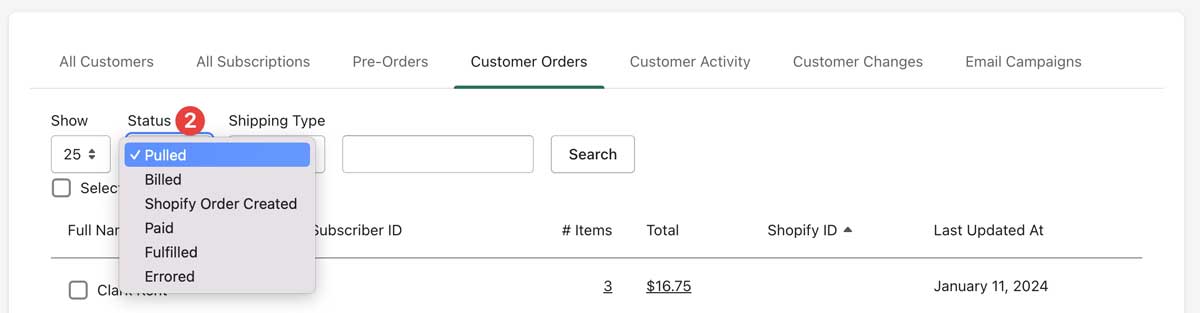
In Customer Orders we have different statuses in the dropdown.
Pulled
Billed
Shopify Order Created
Paid
Fulfilled
Errored
Pulled - Orders that have been pulled for a customer.
Billed - Orders that have been billed and have been created as a Shopify draft order.
Paid - Orders that has been paid through Shopify.
Fulfilled - Orders that have been paid and completed.
Errored - Orders that had something go wrong during the pulled or billing process.
Errored orders can be returned to a pulled status where they can be edited and re-billed.
Shipping Types:
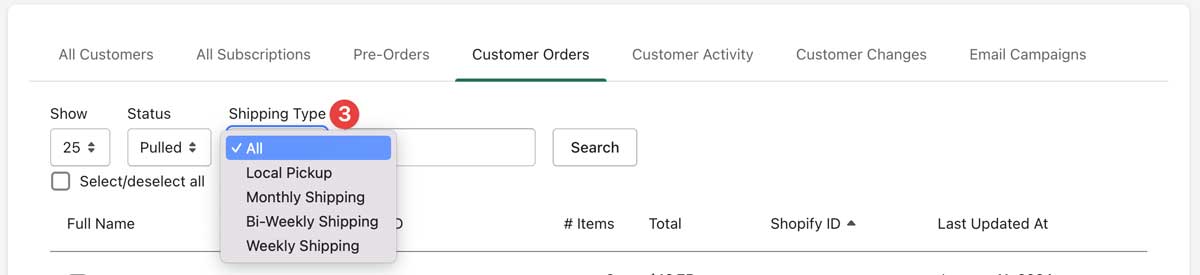
Your customers have different shipping types based on how they want to get their comics.
Local Pickup
Monthly Shipping
Bi-Weekly Shipping
Weekly Shipping
Local Pickup - By Default all customers have local pickup enabled, this means they will pick up their books in-store.
Monthly Shipping - Customers who choose to have their orders shipped once per month
Bi-Weekly Shipping - Customers who choose to have their orders shipped every 2 weeks
Weekly Shipping - Customers who choose to have their orders shipped weekly
Action Buttons
This brief video explains the action buttons within Manage Comics, and how you can use them in different scenarios.

At the bottom of every page, you have options to do things to a number of orders at once.
WARNING: THIS IS DANGEROUS, YOU ARE AFFECTING MULTIPLE ORDERS AND IT CANNOT BE UNDONE.
Delete selected orders (1) - Removes the items from the customer account, and removes the QTY from the Reserved QTY for the product in Shopify. (Subtract 1 from overall QTY)
Delete & Restock Orders (2) - Removes the items from the customer account, moves the Reserved QTY for the product in Shopify to the Available QTY from within Shopify. (Best used when someone "puts something back on the shelf")
Fulfill Orders (3) - Marks the item as picked up by the customer (for reporting), moves the Reserved QTY for the product in Shopify. (Subtract 1 from overall QTY)
Fulfill & Restock (4) - Marks the item as picked up by the customer moves the Reserved QTY for the product in Shopify to the Available QTY from within Shopify. (Enables you to check the order out from non Shopify Point of Sales).
Invoice selected orders (5) - creates an invoice in Shopify and emails the customer about the invoice (from Shopify, using Shopify's email system)
Editing an Order
Clicking on the total for the order will bring up the individual order.
From here you can choose to select individual items (the checkbox).

At the bottom of the modal window you can close (3) the window or click on the X in the upper right hand corner of the window.
The same action buttons as on the customer orders statuses are available, except on an individual basis.
Delete Items (1) - Removes the items from the customer account, and removes the QTY from the Reserved QTY for the product in Shopify. (Subtract 1 from overall QTY)
Delete & Restock (2) - Removes the items from the customer account, moves the Reserved QTY for the product in Shopify to the Available QTY from within Shopify. (Best used when someone "puts something back on the shelf")
Fulfill Items (3) - Marks the item as picked up by the customer (for reporting), moves the Reserved QTY for the product in Shopify. (Subtract 1 from overall QTY)
Fulfill & Restock (4) - Marks the item as picked up by the customer moves the Reserved QTY for the product in Shopify to the Available QTY from within Shopify. (Enables you to check the order out from non Shopify Point of Sales).
Invoice Selected (5) - creates an invoice in Shopify and emails the customer about the invoice (from Shopify, using Shopify's email system)