The Pulls Email Notification lets you send out an email to your customers letting them know what was pulled for them. This email will only go to customers who had something come in for them in that week.
This brief video (under 2 minutes) will walk you through step-by-step how to send out subscriber emails.
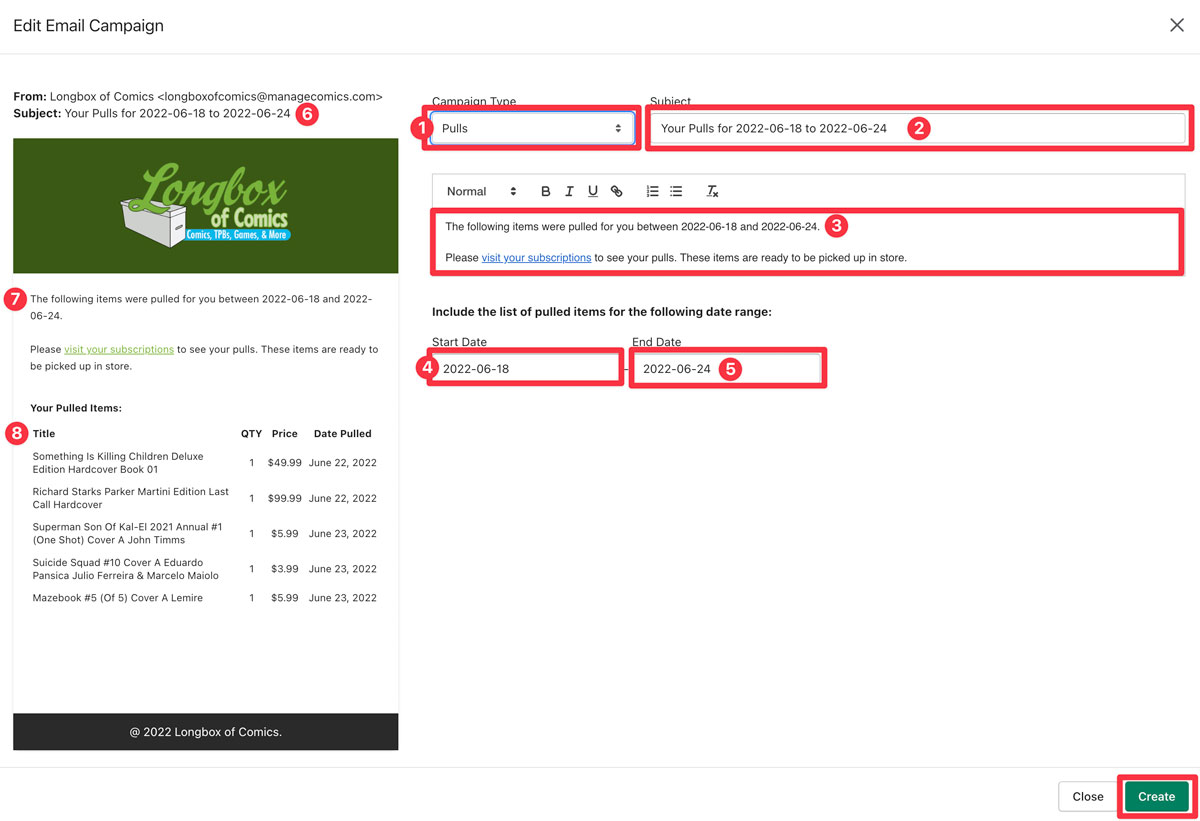
The first thing you will do is change the Campaign Type (1) to Pulls.
A pulls email defaults to a Start Date (4) of 7 days ago, and an End Date (5) of today.
This also updates the Subject (2) to a subject line of "Your pulls for <Start Date> to <End Date>, and adds some text to the body (3) of the email.
You can change the Start Date (4) and End Date (5) to anything you like, as long as you are using Email Variables, the Subject (2) and the Body (3) dates will automatically update.
By default the Body (3) includes the following text:
The following items were pulled for you between [Start Date] and [End Date].
Please visit your subscriptions to see your pulls. These items are ready to be picked up in store.
You can edit any part of this email.
Your changes to Subject (2) will be reflected on the left side of the screen with Subject (6), Body changes (3) will be shown on the left side in the email body (7).
We also show Your Pulled Items, and the information about what was pulled in that period (8) - by default we preview this left side info with the first person's pulls in your list from that week.
IMPORTANT REMINDER - If you change the start and end date, date variables will automatically change the dates in both the subject line and the body of the email, so long as you do not change the Date Variables from their default settings (see below).
About Date Variables:
When you’re creating a pull email, you can now use two special placeholders:
[Start Date]
[End Date]
These placeholders act like little shortcuts. Wherever you drop them in your email subject line or body, Ordo will automatically swap them out for the actual dates you selected when the email is sent.
👉 Example:
What you see in the editor: Your Pulls for [Start Date] to [End Date]
What your customers see: Your Pulls for 2025-02-01 to 2025-02-07
When you are happy with your email, click Create in the bottom right hand corner.
After creating the email, you will be returned to the "Email Campaigns" screen, where you can now send this email.
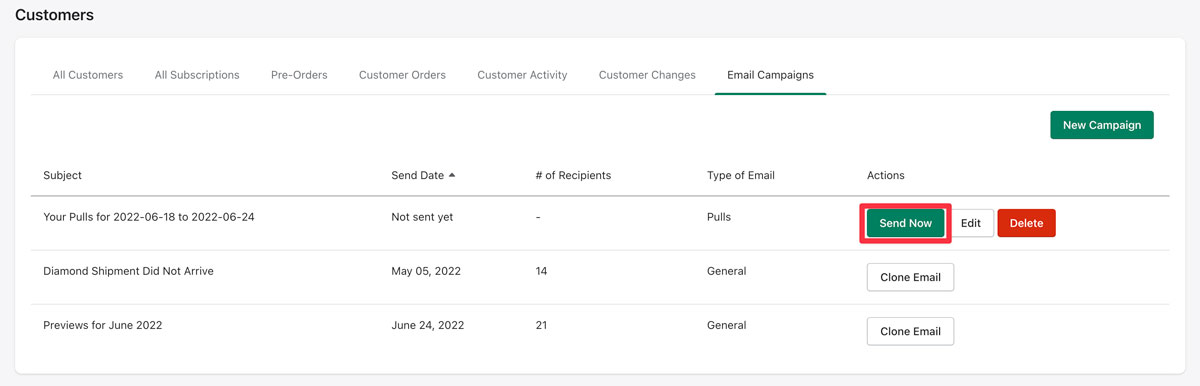
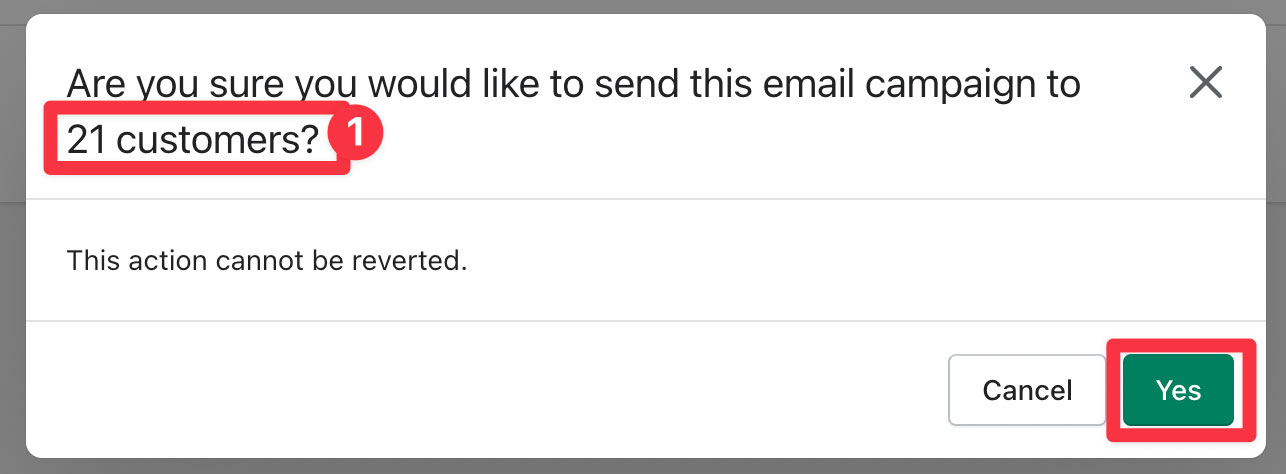
Clicking Send Now will pop up a window asking you to confirm that you are sending this email to the # of subscribers (1) in your database - NOTE: This is just the total number of subscribers, this email will ONLY be sent to subscribers with a pull during this period of time.
Back on the Email Campaigns screen, you will see the # of people the email was sent to (1), and the type of email that was sent out (2).

Don't forget to take a look at our other workflows!