App Embeds are how how make Shopify Apps show up on your website, they're much more robust than the traditional way of adding code snippets to your Shopify store, and they're much more resiliant.
An App Embed will not fail when you update your theme, or make other changes to the theme, and it keeps our Manage Comics code discreet from your Shopify theme code, giving you more flexibility.
This brief video will show you how to add the App Embed.
Note for BinderPOS Customers:
With the App Embed process, you will no longer have to custom configure your BinderPOS account to work with Manage Comics, it just works like magic.
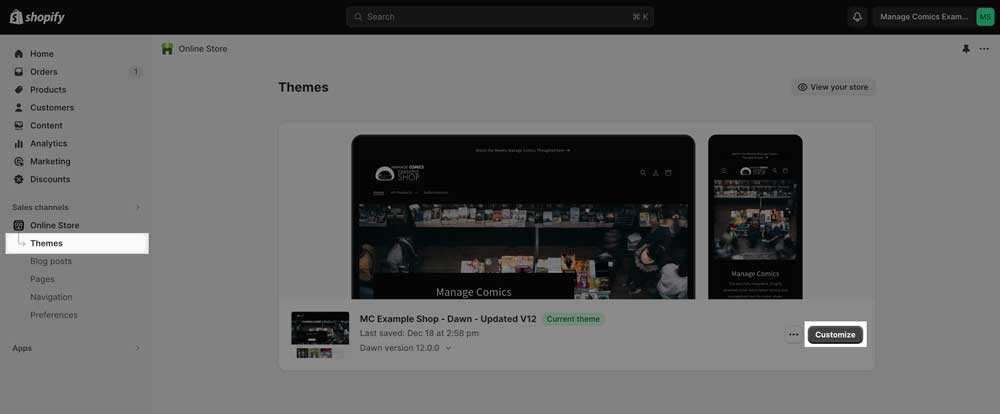
Step 1 Navigate to your theme customizer:
Within Shopify, go to Sales Channels > Online Store > Themes
Click "Customize" on your current theme.
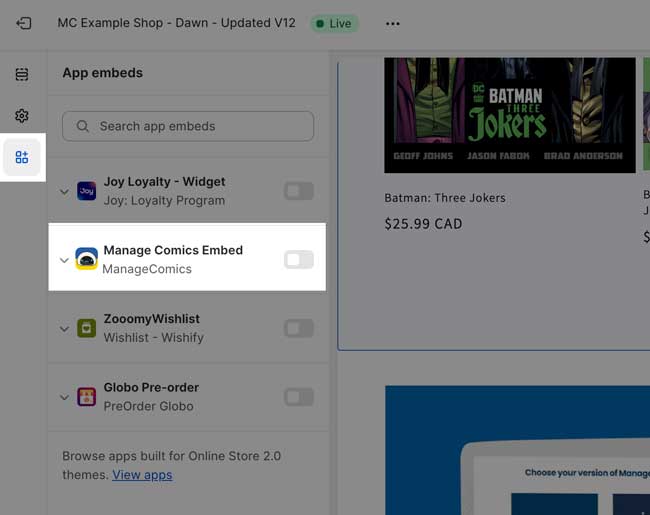
Step 2 Enable the Manage Comics Embed:
Within the customizer, in the upper left hand corner click on the icon for App Embeds (third icon down).
Click the Toggle, and then Click on the arrow to expand the selection items.
Step 3 Configure the buttons:
You can change the button text for the "Subscribe to Series" button, and change the CSS Button Selector (see the other CSS Button Selector Options below).
You can also change the various colors for the button.

How to set your Add to Cart button CSS Selector
Manage Comics does some magic that allows you to quickly and easily add a "Subscribe to Series" button to any comic or TPB that is part of a series. We do it through something called a CSS Selector.
Here's a few codes you can copy and paste into this box to choose your CSS Selector!
Dawn (Pre-Configured): .product-form__buttons
(Also works "out of the box" with themes developed by Shopify such as Crave, Ride, and Refresh)
Expanse: .add-to-cart
Warehouse: .product-form__payment-container
BinderPOS: .quantity-cart
Troubleshooting:
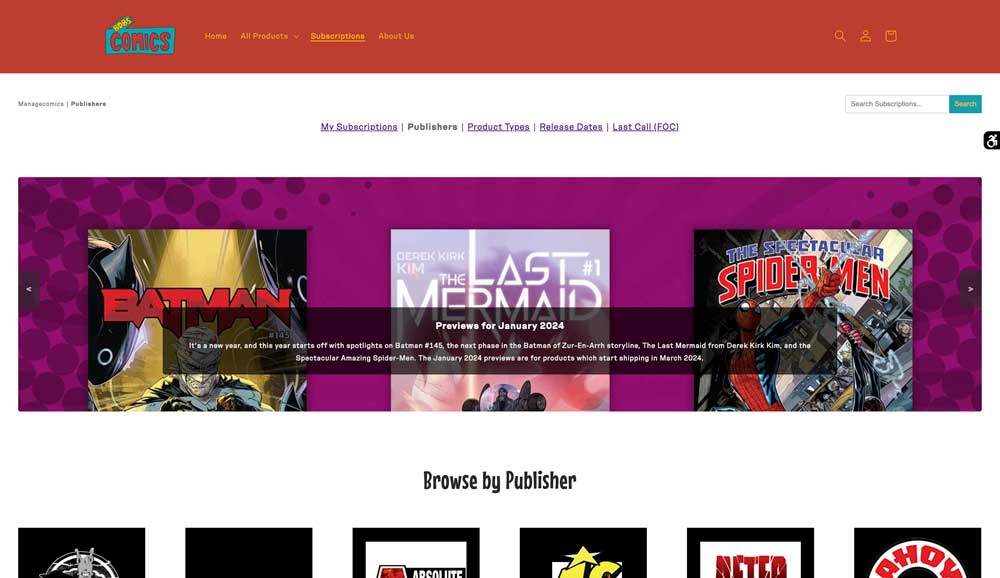
If you find the Manage Comics embed is behaving weirdly and in the middle of your page super narrow, there's a little snippet of CSS code you can add to improve the overall look of the site.
Here's an example of the super-narrow page width:
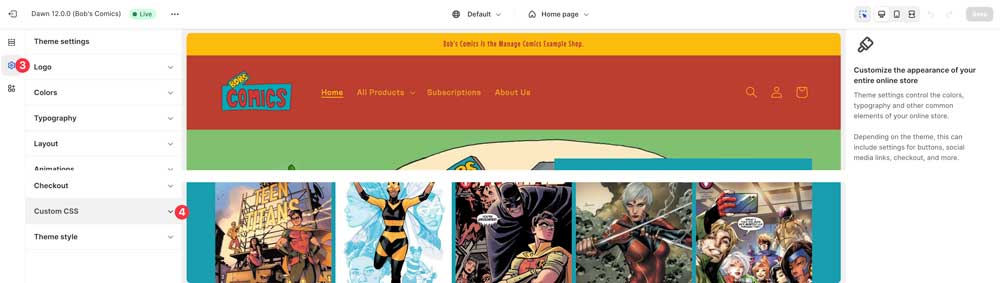
Step 1: Navigate to your theme.
Go to Sales Channels, Online Store, click on Themes (1), and click the "customize" button (2).

Step 2: Navigate to Custom CSS in settings
Click on the gear icon (3) on the customize options, and scroll to Custom CSS (4), and click to open it.
Step 3: Enter Custom CSS Code into the box.
In the custom CSS box, add the following code snippet.
.page-width--narrow {margin: 0 auto;max-width: 1200px;}
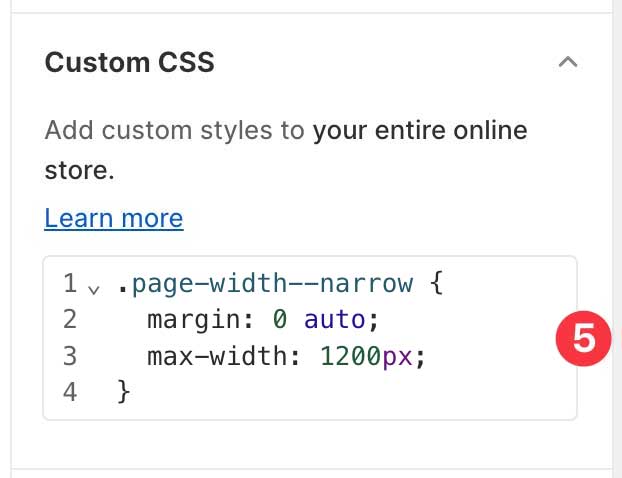
Step 4: Save the page.
In the upper right hand corner of the page, you'll see the "save" button, click this, and your changes are saved!

Step 5: Test and Enjoy!
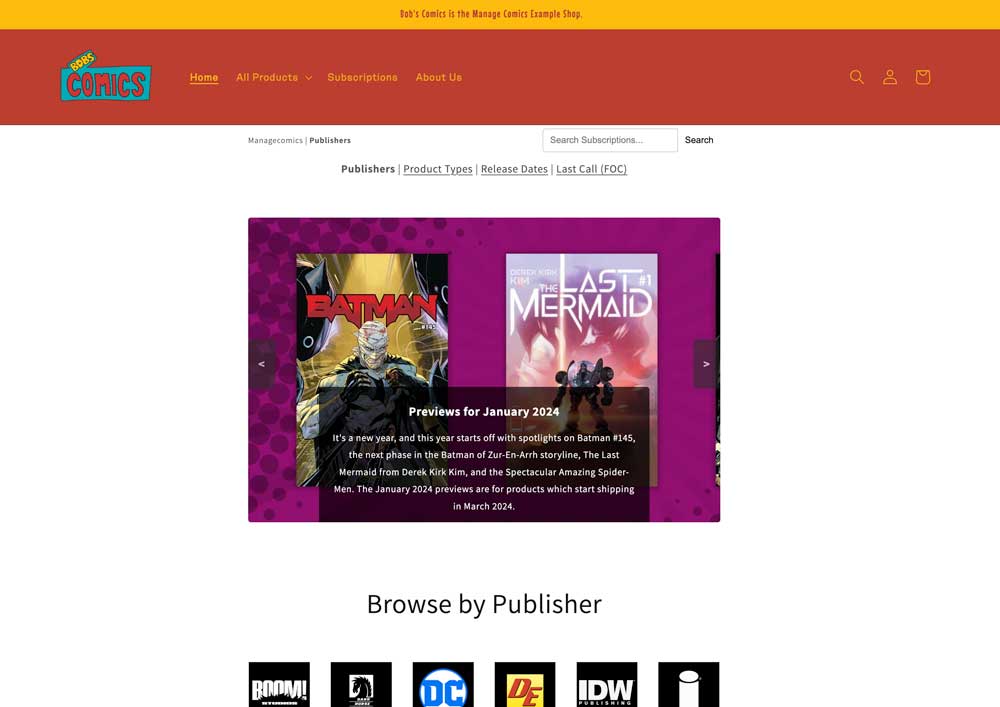
Go to your subscriptions pages on the website.
You'll see your new changes and everything will look awesome!
Troubleshooting subscription pages not showing up:
If the page is not rendering at all, you can also create your own page template for the Manage Comics pages.
This usually happens when the "Eyeball" on the default page is hidden. You may have legitimate reasons for hiding the eyeball, but this will cause issues with the Manage Comics pages rendering.
We're going to create a new template, add a "Custom Liquid" section to the new template, and add some code (watch the video for full details).
The code you will need for the Custom Liquid part of the page.
<div id="managecomics"></div>
<style>h1.main-page-title {display: none;}</style>
Ensure that the "Page Eyeball" is visible.
Custom CSS Code for the theme template:
#managecomics {margin: 0 auto;max-width: 1200px;}
Watch the video for a full walkthrough.