Somethings wonky. You don't know if its Shopify, Manage Comics 2 Subscriptions, weird data, or sunspots and gamma waves, but it's definitely an issue.
Until we have the technology to see the screen through your eyeballs (Zuckerberg promised that for Meta 2.3.1, right?) screenshots will have to do. (Possibly followed by a screen share session)
Listen, I don't want to bag on anyone's artistic talent, or accuse them of taking a photo using a potato. Sometimes somethings better than nothing.
However, taking slick screenshots that pinpoint the trouble clearly, is a great skill to have in the ol' tool box, and it's relatively quick and easy.
First, I will cover the old standard way for both Windows and Mac. Later on. At the end. I'm including them because they are better than a potato. User-friendly, they are NOT.
The easier way is using an app or extension.
Awesome Screenshot and Screen Recorder is free, and available for most systems and/or browsers. (note: No affiliation. I use the free version, but feel free to try one of the many other options out there) I will be using Chrome throughout this, but the nuts and bolts should be the same, regardless.
Here is where you can get it: I've included the 3 most common.
(If you have Opera or something installed, I am certain you know your way around well enough to grab it or something like it)
Chrome
Mac
Edge
Ok, now that you have it installed, click on it to get started:

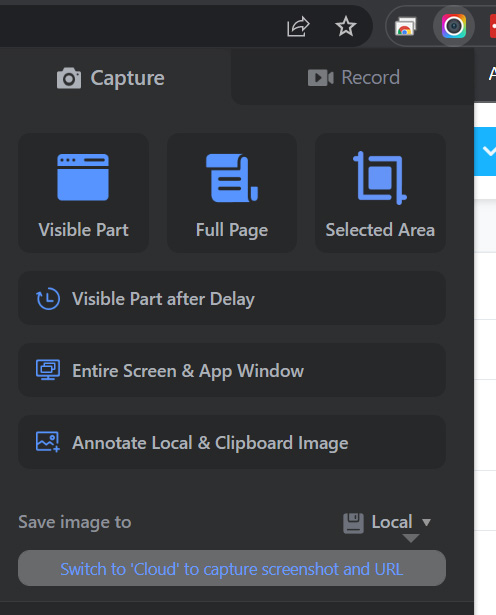
Clicking on the rainbow colored camera brings up its menu:
(Hovering over the top 3 icons will show the hotkeys for each)
For most instances, we will probably want to use the 3rd option - Selected Area
That way we keep to the details.
Using Selected Area, drag a box to cover the part of the screen you want
If you didn't get it quite right, you can drag the white circles on the box to fit.
If you are happy with the selection, you could hit Copy and just paste it directly into a message, but lets try Capture, instead.
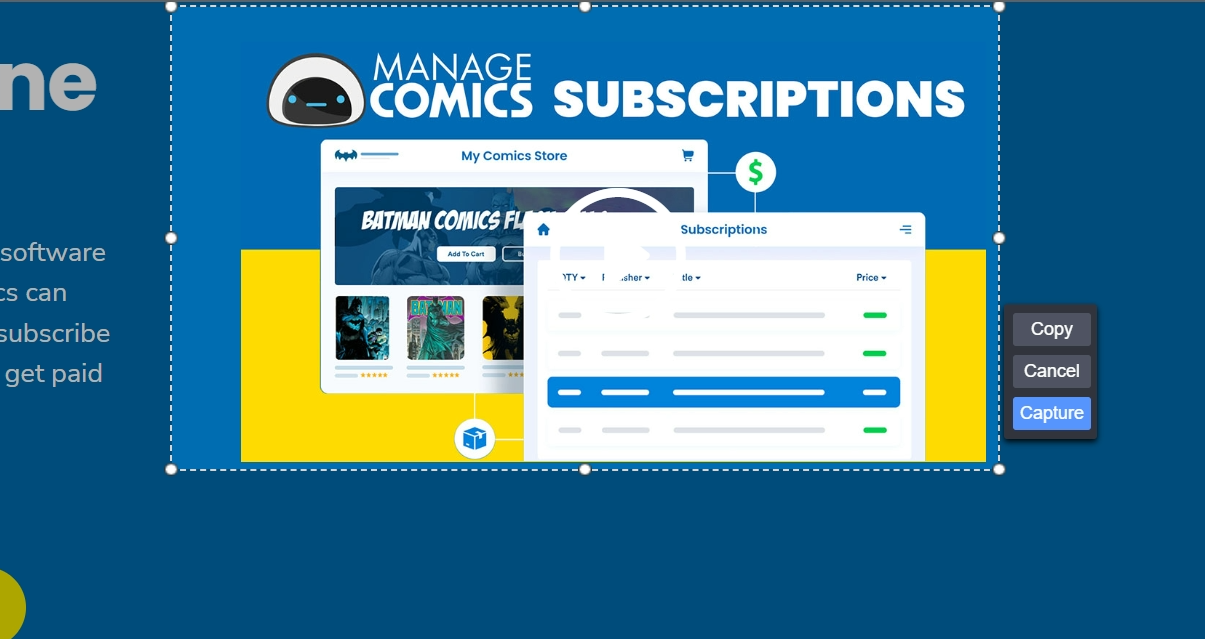
You will see why in just a moment.
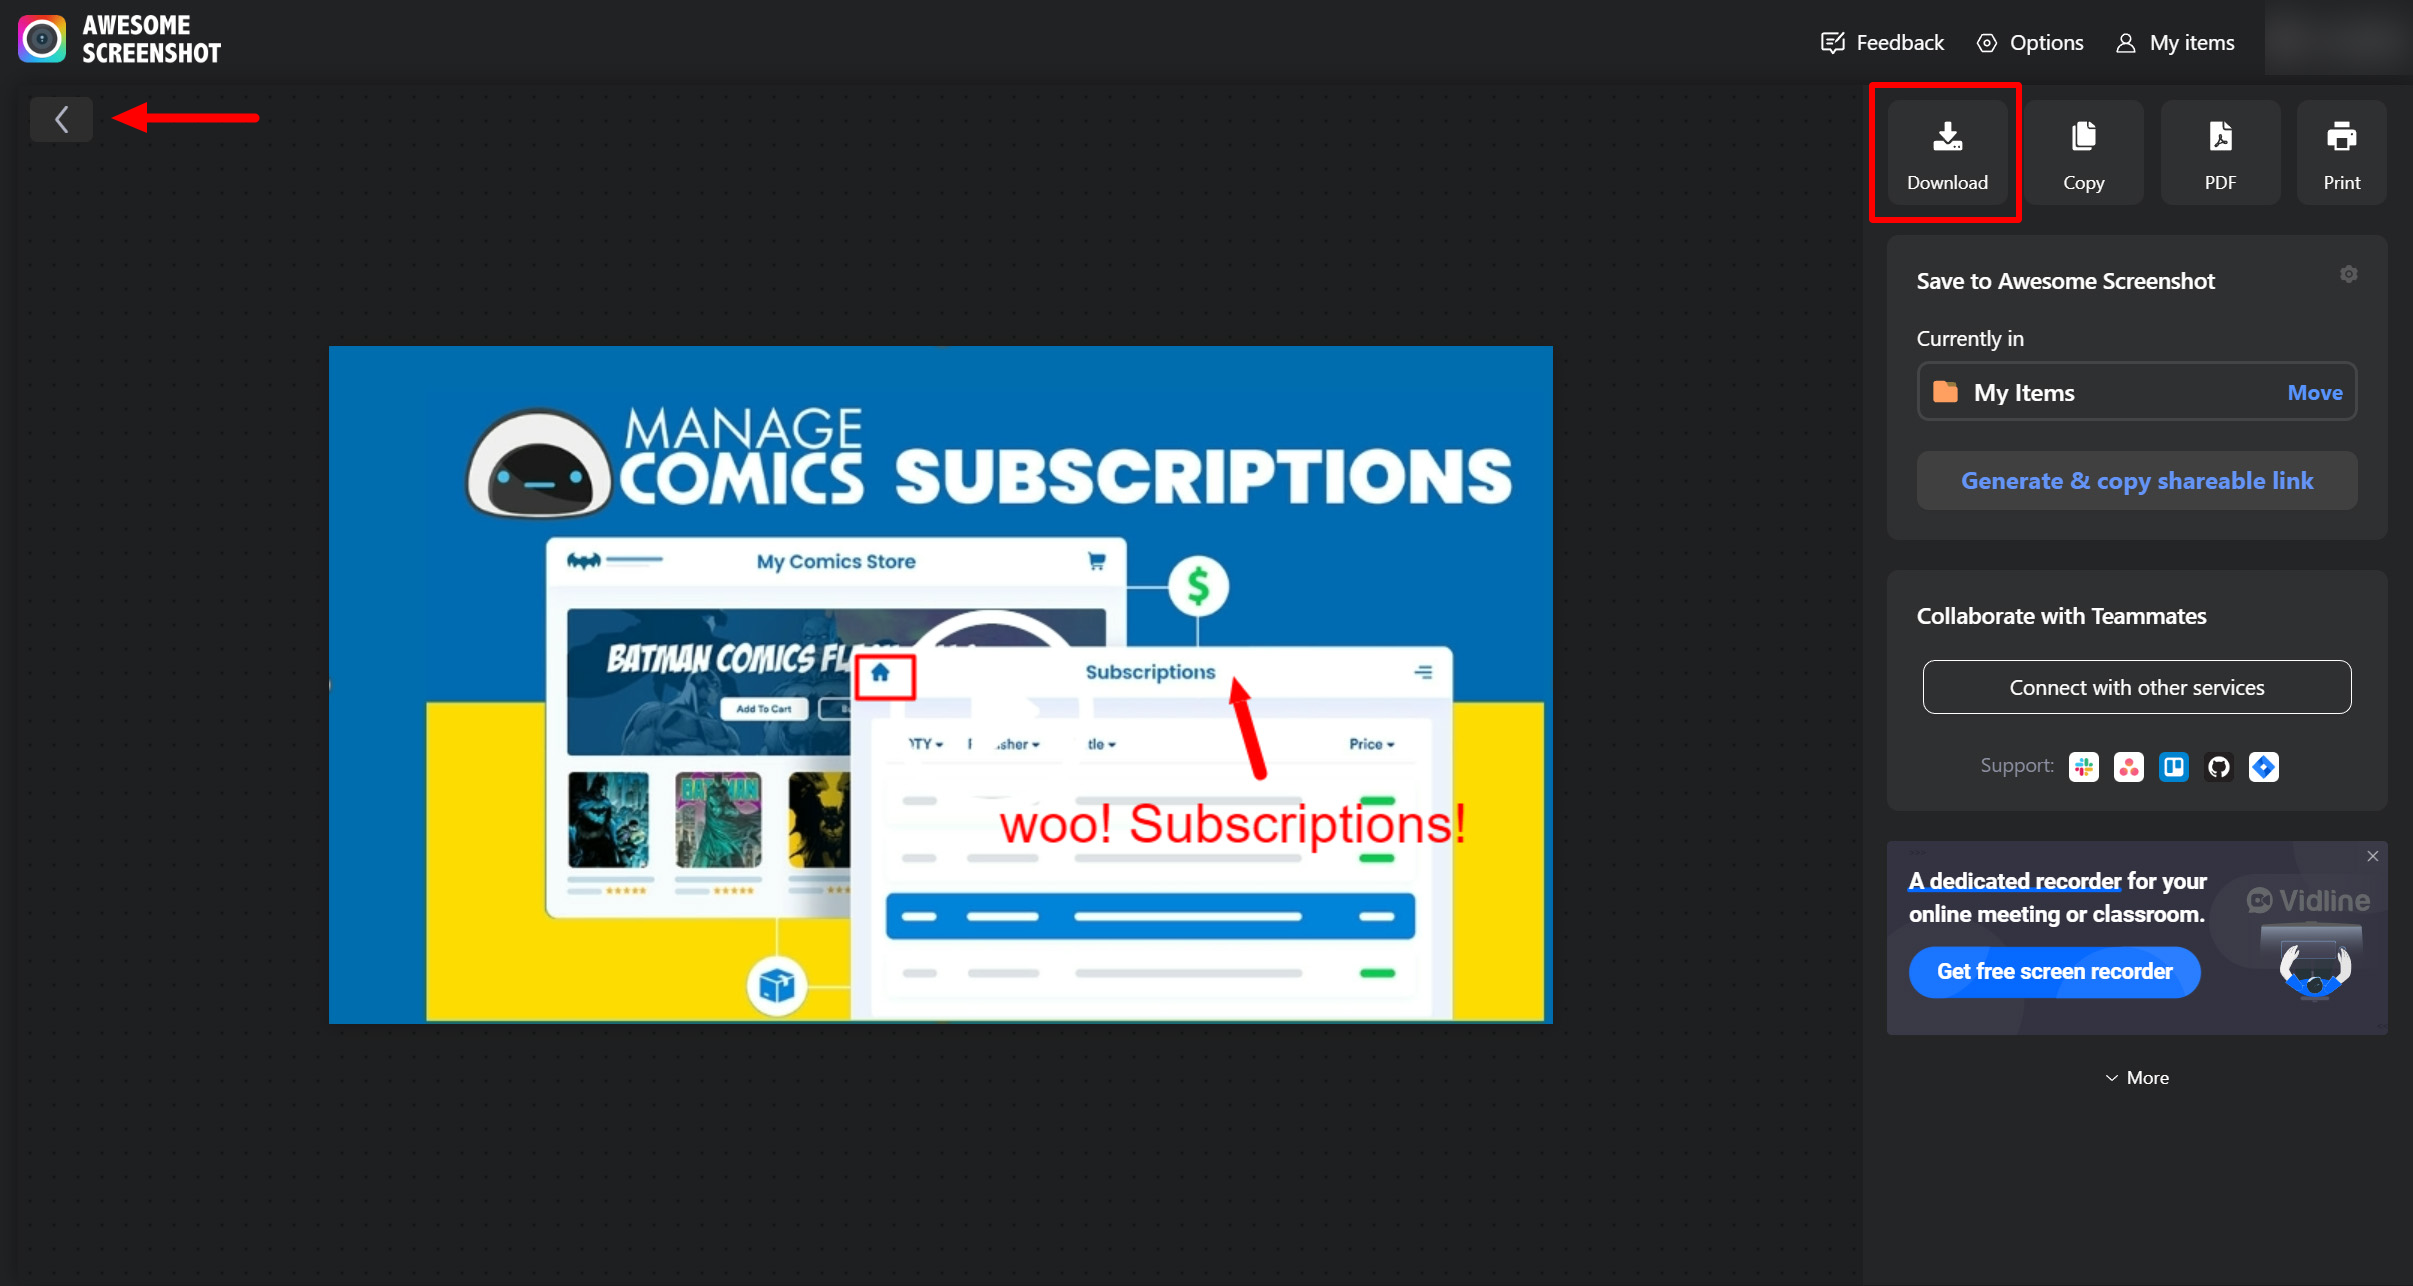
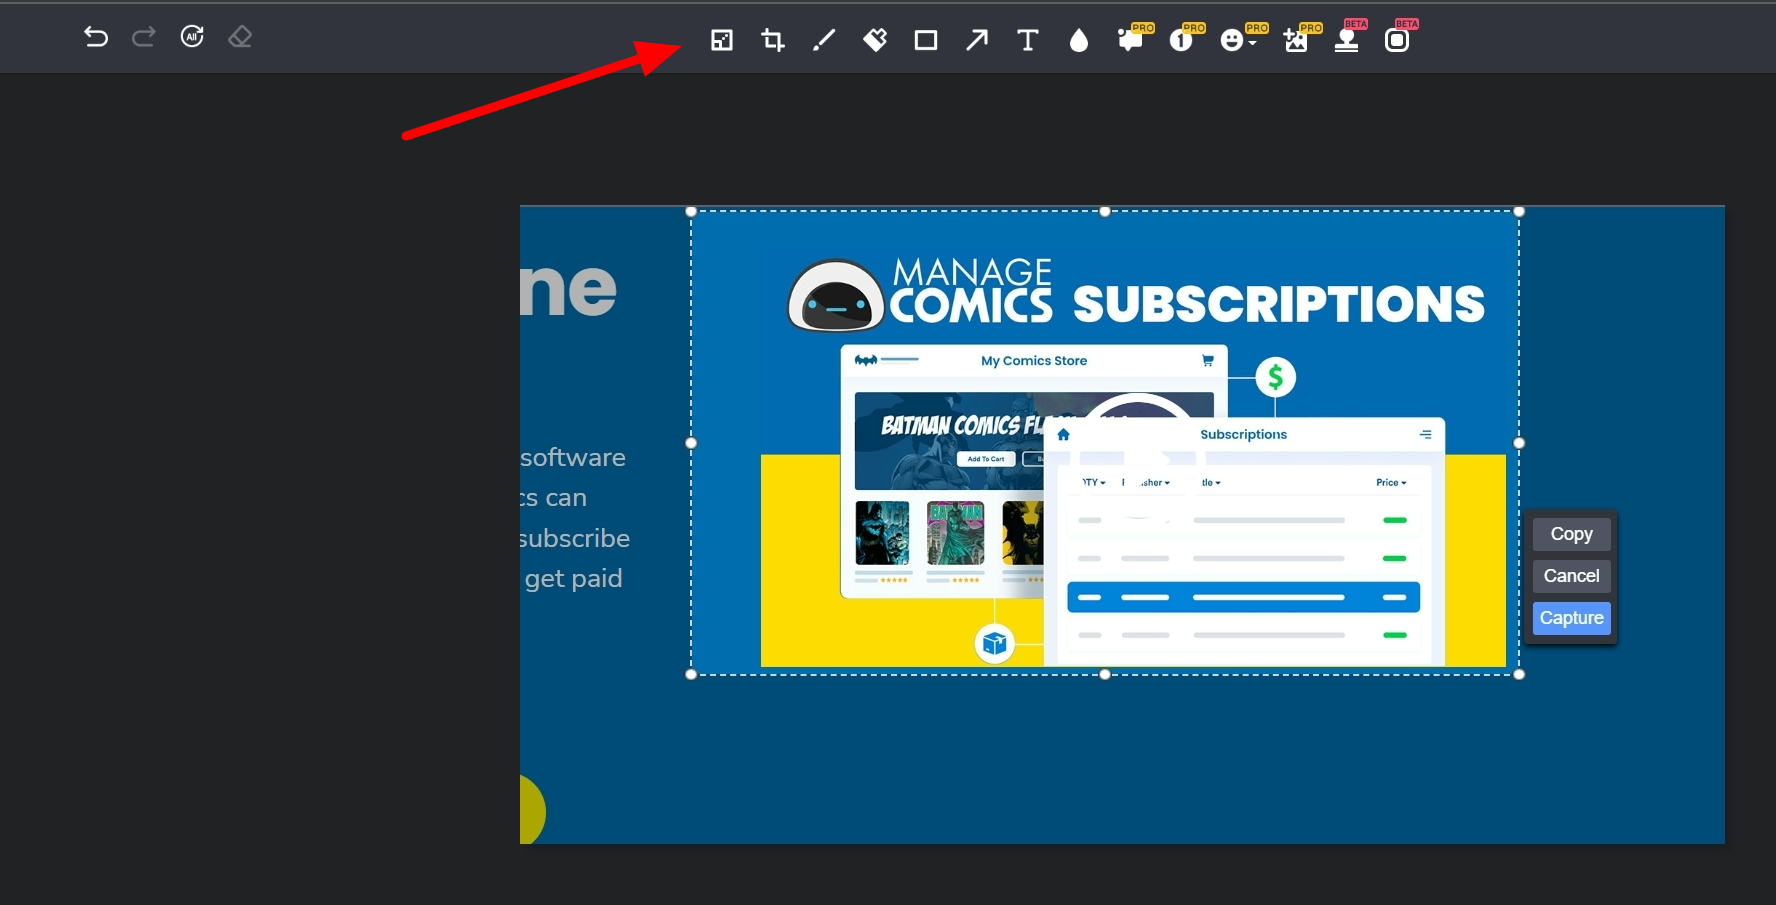
If you look at the top of the screen, you will see a bunch of tools.
You can use them to resize, and crop. You can also put boxes around stuff, add arrows, and text.
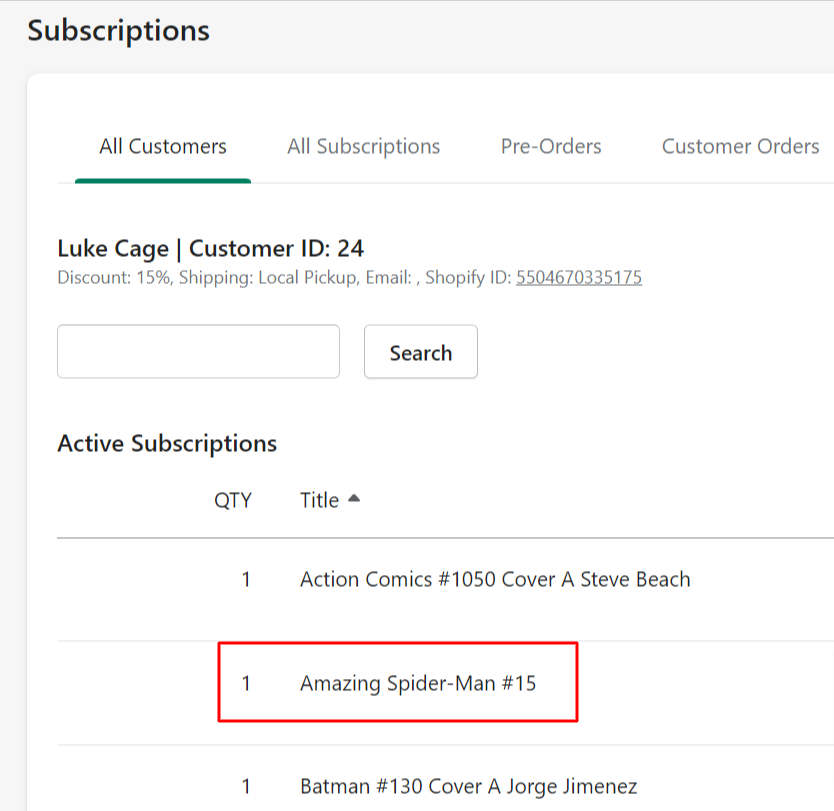
Boxes are great for pointing out something specific when there's a lot of text on the screen
Look at that Amazing Spider-Man. I mean, just look at it. Just sitting there. Being amazing.
If you've finished with your boxes and arrows, just click the Done button in the upper right corner
If you forgot to add an arrow, don't worry. You can go back. Just click the back arrow in the upper left.
If you are happy with it, click on Download to save it to your computer, so you can paste it into your help ticket.
Or print it out to hang on your wall. I'm not judging.
There you have it. That's it. I told you it was quick and easy. No blurry, weird angles. No migraines. Beautiful.
Now, if you wanna do it the hard way, I've included a few options below, as promised.
_________________________________________________________________________________________________________
Windows
Depending on your hardware, you may use the Windows Logo Key + PrtScn button as a shortcut for print screen. If your device does not have the PrtScn button, you may use Fn + Windows logo key + Space Bar to take a screenshot, which can then be printed.
To locate your screenshots, open File Explorer from the taskbar. On the side navigation pane, select the Pictures folder, and select Screenshots.
Windows 10/11
To use the Snipping Tool when you have a mouse and a keyboard:
Press Windows logo key + Shift + S. The desktop will darken while you select an area for your screenshot.
Rectangular mode is selected by default. You can change the shape of your snip by choosing one of the following options in the toolbar: Rectangular mode, Window mode, Full-screen mode, and Free-form mode.
The screenshot is automatically copied to your clipboard. A notification also appears once you're finished taking a screenshot, select it for more editing options.
To use the Snipping Tool with only a mouse:
To open the Snipping Tool, select Start, enter snipping tool, then select it from the results.
Select New to take a screenshot.
Rectangular mode is selected by default. You can change the shape of your snip by choosing one of the following options in the toolbar: Rectangular mode, Window mode, Full-screen mode, and Free-form mode.
The screenshot is automatically copied to your clipboard. A notification also appears once you're finished taking a screenshot, select it for more editing options.
Mac
How to take a screenshot on your Mac
To take a screenshot, press and hold these three keys together: Shift, Command, and 3.
If you see a thumbnail in the corner of your screen, click it to edit the screenshot. Or wait for the screenshot to save to your desktop.
How to capture a portion of the screen
Press and hold these three keys together: Shift, Command, and 4.
Drag the crosshair to select the area of the screen to capture. To move the selection, press and hold Space bar while dragging. To cancel taking the screenshot, press the Esc (Escape) key.

To take the screenshot, release your mouse or trackpad button.
If you see a thumbnail in the corner of your screen, click it to edit the screenshot. Or wait for the screenshot to save to your desktop.